|
Making Half Lap Joints:
Wood Joinery Made Easy for Building Furniture, Building Fences, and More
© 2008 by Kelly R. Smith all rights reserved; content may not be copied, rewritten, or republished without author’s written permission

A half lap joint strengthened with dowels
This article was updated on 09/21/20.
Every woodworker and finish carpenter has his or her favorite member of the wood joinery universe. But it's important to have a mental toolbox full of them. The half lap joint is one of the simplest (much easier than making dovetail joints) and lends itself to furniture making.
Basically, this joint is used to mate two pieces of the same size stock. It can be used to mate right angles or when joining two boards in continuous runs where strength is more important than the good looks of a miter.
Tools to Cut Half Lap Joints
There are many ways to cut half lap joints and the method employed depends on the size of the stock. For larger projects where the stock is at least two inches in either direction, I like to use my table saw with a stacked dado set. Always follow these table saw safety tips. Fingers don't grow back; I know, my grandfather was a butcher.
For smaller stock, a router table works well. For very small work, such as model construction, I like to cut them by hand with a coping saw. The thinness of the blade allows for precise, slender cuts but a close eye must accompany these freehand cuts.
Other possibilities include a radial arm saw or a miter saw. If you're really in a pinch, even a circular saw may be used,but this can get messy. You'll have to set the blade depth, cut out slices, and finish by using a hammer and chisel to knock out the scrap.
Setting up and Cutting the Joint on a Table Saw
First, determine the width of the cut and set up the dado set and mount it on your saw's arbor. It's important to get the blade cutting depth exactly right. Use a scrap piece of stock that is the same dimensions as the project material for this step.
Once you've got the proper depth set, go ahead and make all the cuts that you intend to make. Proper set-up usually takes the most time on most projects; you only want to do it once. If you don't have a dado set, you can make consecutive cuts at the width of your blade and clean it up with a chisel or even a Dremel tool.
Assemble and Finish Your Project
Just like any other joinery technique, the first and most important thing to do at this point is to make a dry fit and make any fine-tuning adjustments. Then, spread your favorite woodworking glue (I'm becoming more and more of a Titebond devotee all the time) on one of the pieces and mate them up.
Once both pieces are perfectly aligned, clamp it up and let the glue cure. I almost always put wax paper between the wood and the clamp jaws. Also, I put some on my workbench under the project. This eliminates squeeze-out problems. But check out all our tips on woodworking glue-ups.
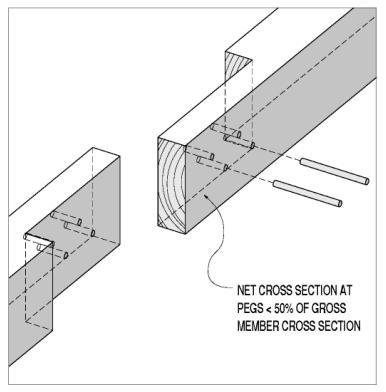
When the glue has dried, I like to drill through the joint and glue in a piece (or several) of dowel. It lends a lot of additional strength and if the color of the dowel is different than the color of the wood, it gives the project an interesting look. And really, in the larger scheme of things what is the significance of a bit more work to the longevity of the completed project?
That's all about there is to making half lap joints. There are many variations of construction depending on requirements so don't be afraid to get creative.
Visit Kelly's profile on Pinterest.
Recommended Woodworking Articles
Looking for more great content? Visit our partner sites:
The Green Frugal
Running Across Texas

Do you need an article or blog post written? I offer that service at a competitive rate. Contact me for a quote!
Did you find this article helpful? Please consider supporting this free site with a small donation! We rely on our info-seeking readers rather than a paywall to keep the lights on and the info flowing.
About the Author:
 Kelly R. Smith was a commercial carpenter for 20 years before returning to night school at the University of Houston where he earned a Bachelor’s Degree in Computer Science. After working at NASA for a few years, he went on to develop software for the transportation and financial and energy trading industries. He has been writing, in one capacity or another, since he could hold a pencil. As a freelance writer now, he specializes in producing articles and blog content for a variety of clients. His personal blog is at I Can Fix Up My Home Blog where he muses on many different topics. Kelly R. Smith was a commercial carpenter for 20 years before returning to night school at the University of Houston where he earned a Bachelor’s Degree in Computer Science. After working at NASA for a few years, he went on to develop software for the transportation and financial and energy trading industries. He has been writing, in one capacity or another, since he could hold a pencil. As a freelance writer now, he specializes in producing articles and blog content for a variety of clients. His personal blog is at I Can Fix Up My Home Blog where he muses on many different topics.
|