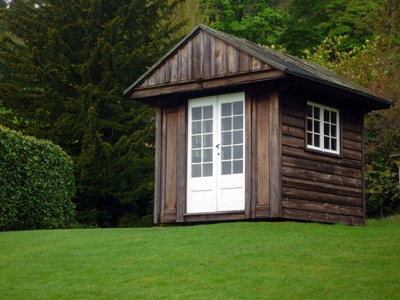
How to Build an Inexpensive Storage Shed in Your Backyard
Basic Framing and Carpentry Skills Make This a Fun Project
© 2013 by Sarah Harris; all rights reserved; content may not be copied, rewritten, or republished without written permission.


If you’re a homeowner who enjoys taking on a wide range of do-it-yourself tasks, chances are you’re running out of room for all of your construction gear.
That garage can fill up in a hurry, especially if your significant other actually expects to use it for parking cars. So you’ve got to find somewhere else for all of your tools, your DIY projects, your man cave or gardening fanatic’s workshop.
You can’t add on to the house and you can’t move, so the next best idea is to build a storage shed in the backyard. Sheds like this can be simple wood and metal structures that house your gear, or complex mini-houses with running water and electricity.
Your best bet is to start small, and eventually replace it when the need arises. So here is a step by step look at how to build an inexpensive storage shed in your backyard.
How are Your Construction Skills?
First of all, you really shouldn’t take this on unless you have a good working knowledge of construction projects and a bit of experience in that arena.
You must be confident reading building plans and working with a measuring tape, a hammer, and a nail gun. If you’re not comfortable with any of these things you might want to pay a little more for a prefabricated house that is easy to put together.
Regardless, you’ve got to check with the town building board before getting started. Depending on where you live you may have to apply for a building permit.
Check Your Local Building Code
And if you are going to include plumbing or electricity always hire professionals to handle those elements. In most areas that is in the code and you will have to pony up the extra cash so the city building inspectors will sign off on it.
Once you’re ready, clear off the area where you will build the storage shed and make sure the ground is totally level. Stake the area out, and make sure it is exactly square.
Once the measurements are uniform, you’ll lay out the footing, with solid concrete slabs, poured concrete or patio pavers. You should also set up a foundation with CMU block, to make sure the footing will remain undamaged by water.
As an alternative you can set 4” X 4”s in concrete and then build the subfloor on them. The process is similar to building a deck.
The floor itself you will construct out of wood, but make sure it’s pressure-treated. You could also lay in a subfloor if you really want this storage shed to last. Just use inexpensive plywood.
The walls you’ll build one after the other. Framing out the doors and windows isn’t easy, so hunt down directions if you’ve never done this before. This framing basics article gives a good overview.
Building the Shed Walls
Temporary braces will hold each wall in place before you nail them into the subfloor. Just make sure you secure each wall to the floor before building the next one. Once they’re all in place you can nail them together and double-check all of the connection points.
The easiest way to take care of building the walls is to put them together on the subfloor and then stand them up. This is easiest done with the help of an assistant.
Building the Roof
The roof construction will depend on the style of the roof, and the type of material you are using. Just make sure you can get the whole roof completed before any inclement weather rolls through, as you definitely want to avoid water damage underneath the shingles or corrugated steel sheets.
Build your rafters with the desired pitch and secure the to the top plate on 16” centers (or whatever your framing building code calls for).
Dry It In With Siding
Once the roof is complete, you’ll have to prepare the exterior for painting and take care of any of the plumbing and wiring you have planned. Install siding if you’re using it, lay in the windows and doors and caulk any loose seams.
You have a choice of installing a prehung door or building one yourself. Personally, I recommend building your own so you can make it as wide as you like. Remember that you will be moving large object in and out.
Apply a water sealant if you’re leaving wood exposed, and you can add insulation inside the walls. Again, it would be much easier to use one of those sheds direct websites with a prefab model. But you won’t get exactly what you want unless you build it out yourself.
However, you should check out Craigslist for sheds for sale before taking on a building project you aren’t comfortable with. Depending on the size you have in mind you could have a completed shed moved to your property that may just do the trick.