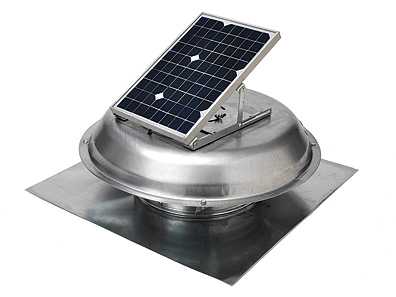
How to Install a Power Attic Vent:
Solar Powered and Wired Fans Remove Hot Air and Minimize Toxic Mold
© 2009 by Kelly Smith all rights reserved

Power attic vents are activated by temperatures reaching a specified setting. Turbine (whirlybird)
and ridge vents are considered passive components because air flow/negative pressure operate
passive vents.
It should be pointed out that
ridge vents equipped with baffles are more efficient
in using negative
air pressure, and power vents use a thermostat and sometimes a humidistat.
Minimizing moisture in the attic is critical to the health of the home and family members because
it reduces the chance of growing mildew and toxic mold.
Home Power or Solar Power Attic Vents: Pros and Cons
These are the two types of attic and roof ventilation devices discussed in this article. The
home-powered models just tie into an available electrical circuit for energy while the solar-powered
exhaust fans utilize a small solar panel to supply power to them.
Two factors that are important to consider are the cost of operation as well as the homeowner’s
desire to zero in on the green home building concept. To some,
solar energy powered anything is trendy,
hip, and environmentally-friendly. Save the planet. But consider,
- Solar units are expensive. Although the basic price has trended down over time, you can
still expect to pay upwards of $200 to $300.
- Some home-powered models cost much less money to operate than they save on utility bills
over the predicted life span on the unit. Always research and do a cost analysis.
- Like making hay, solar panels only operate while the sun shines. Will trees block the light?
First, Determine the Correct Size Fan
All attic exhaust fans are rated by CFMs (Cubic Feet of air moved per Minute). To establish the model
capacity for a your home, first calculate your attic's square footage.
Next, multiply the square footage by a factor of 0.7; this is the CFM fan rating you need. As an
example, if you have a 2000 square foot attic space, 2000 X 0.7 = 1400 CFM.
What’s the Best Attic Vent Position?
From high school physics, we know heat rises, so it's obvious that the roof vent needs to be
installed close to the ridge of the roof. First, locate the center of your house in a left and right
sense.
This is “approximately” where the vent should be located. Shift it slightly right or left as
needed to position it between trusses or to take full advantage of the sun.
The installation hole should be cut from the exterior of the roof but the
truss, or rafter, location
is only visible from the attic side.
The easiest method of dealing with this little issue is to construct a cardboard template the size
and shape of the throat of the vent. With any luck this will be included on the box, courtesy of the
manufacturer.
Now, hold it against the roof sheathing from underneath (inside the attic), and drive four nails straight
up through the roof (top, bottom, left, and right).
Cut the Vent Installation Hole
Using the protruding nails and the cardboard template as a guide, wield a utility knife to carve away
the shingles and roofing felt.
Hint: Wearing work gloves will conserve your knuckle skin when the utility knife
slips. And it will slip, believe me!
Now, use a jigsaw or Sawzall reciprocating saw to cut out the sheathing.
Finally, Install Your Vent
- Separate the dome from the vent.
- Apply high-quality caulk generously to the bottom of the flange.
- Find the side of the flange with the inscription “Up”.
- Slide the flange up under the upper shingles.
- Nail the flange down using galvanized roofing nails.
- Spread roof cement liberally over all nail heads and any place water might make an entrance.
- Don’t worry about being pretty with the sealing; nobody will be seeing it from the ground.
- Re-install the dome.
- Wire up the fan motor based on the manufacturer’s instructions as well as your local
electrical building codes.
- In the majority of cases, the unit’s thermostat should be set at 90 degrees. This will cause
the fan to enrgize at 120 degrees and power down at 90.
More Ventilation and Energy Efficiency Articles
|